Post Deployment
Follow the instruction below to complete the setup of Microsoft Entra ID authentication for the Core API and Chat applications after the deployment is complete.
Update App Configuration settings
Sign in to the Azure portal as at least a Contributor.
Navigate to the resource group that was created as part of the deployment.
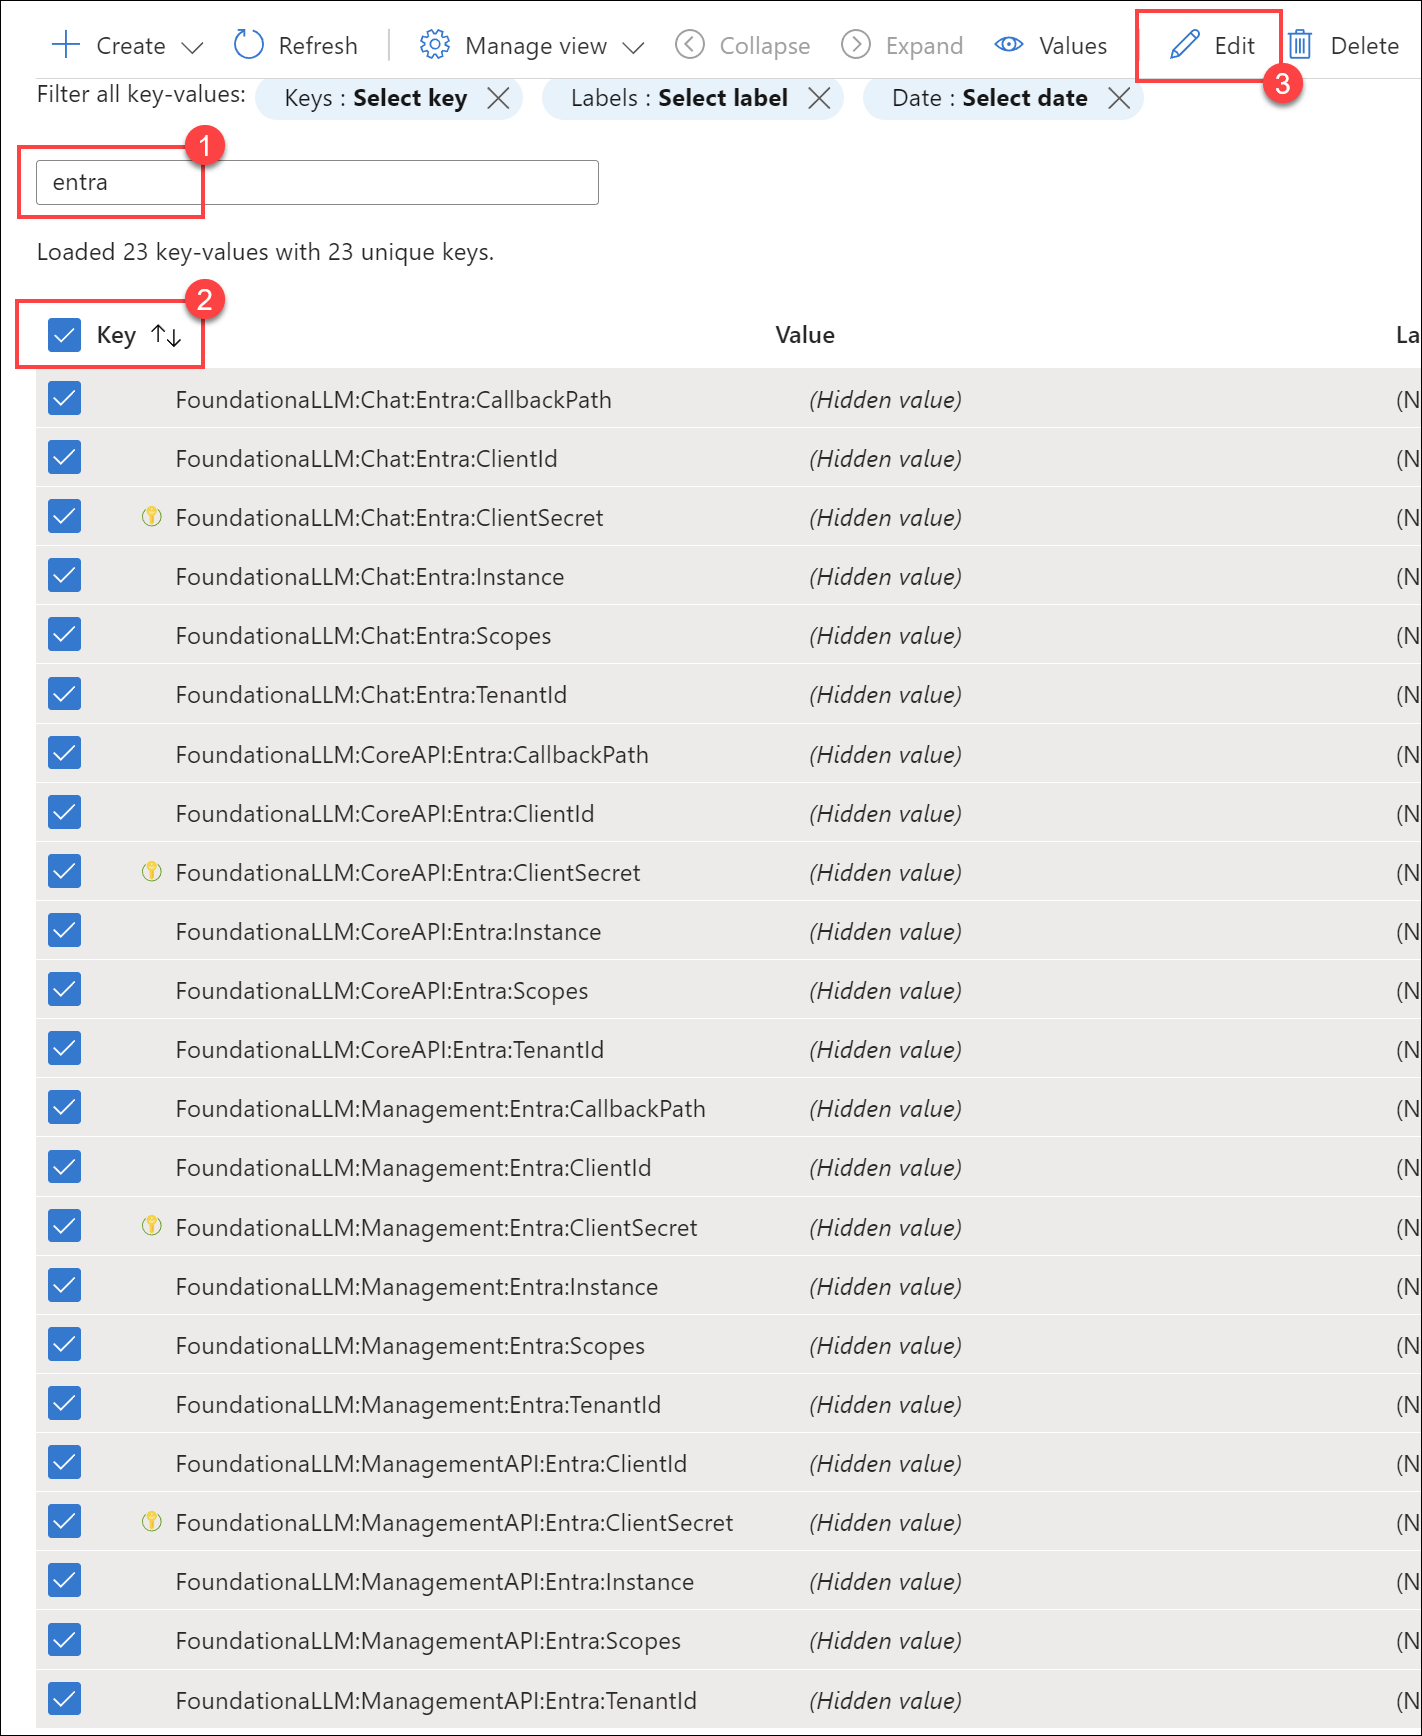
Select the App Configuration resource and select Configuration explorer to view the values.
Enter
entrain the search box to filter the results.Check the box next to Key in the header to select all items.
Select Edit to open a JSON editor for the selected items.

Replace the values for the following settings with the values that you recorded earlier:
FoundationaLLM:Chat:Entra:ClientId: The Application (client) ID of the client application that you created earlier.FoundationaLLM:Chat:Entra:Scopes: The fully-qualified scopes path for the API application that you created earlier. For example, it should look something likeapi://FoundationaLLM-Core/Data.Read.FoundationaLLM:Chat:Entra:TenantId: The Directory (tenant) ID of the client application that you created earlier.FoundationaLLM:CoreAPI:Entra:ClientId: The Application (client) ID of the API application that you created earlier.FoundationaLLM:CoreAPI:Entra:TenantId: The Directory (tenant) ID of the API application that you created earlier.
Validate the following values while reviewing the settings:
FoundationaLLM:Chat:Entra:CallbackPath: Should be/signin-oidc.FoundationaLLM:Chat:Entra:Instance: Should behttps://login.microsoftonline.com/.FoundationaLLM:CoreAPI:Entra:CallbackPath: Should be/signin-oidc.FoundationaLLM:CoreAPI:Entra:Instance: Should behttps://login.microsoftonline.com/.FoundationaLLM:CoreAPI:Entra:Scopes: Should beData.Read.
Select Apply to save the changes.
Next steps
Now that Entra authentication is fully configured, restart the Core API and chat applications to apply the changes. Navigate to your chat application or refresh the page if it is already open. It should automatically prompt you to sign in with your Microsoft Entra ID account.
Restart Core API and Chat UI applications in an ACA Deployment
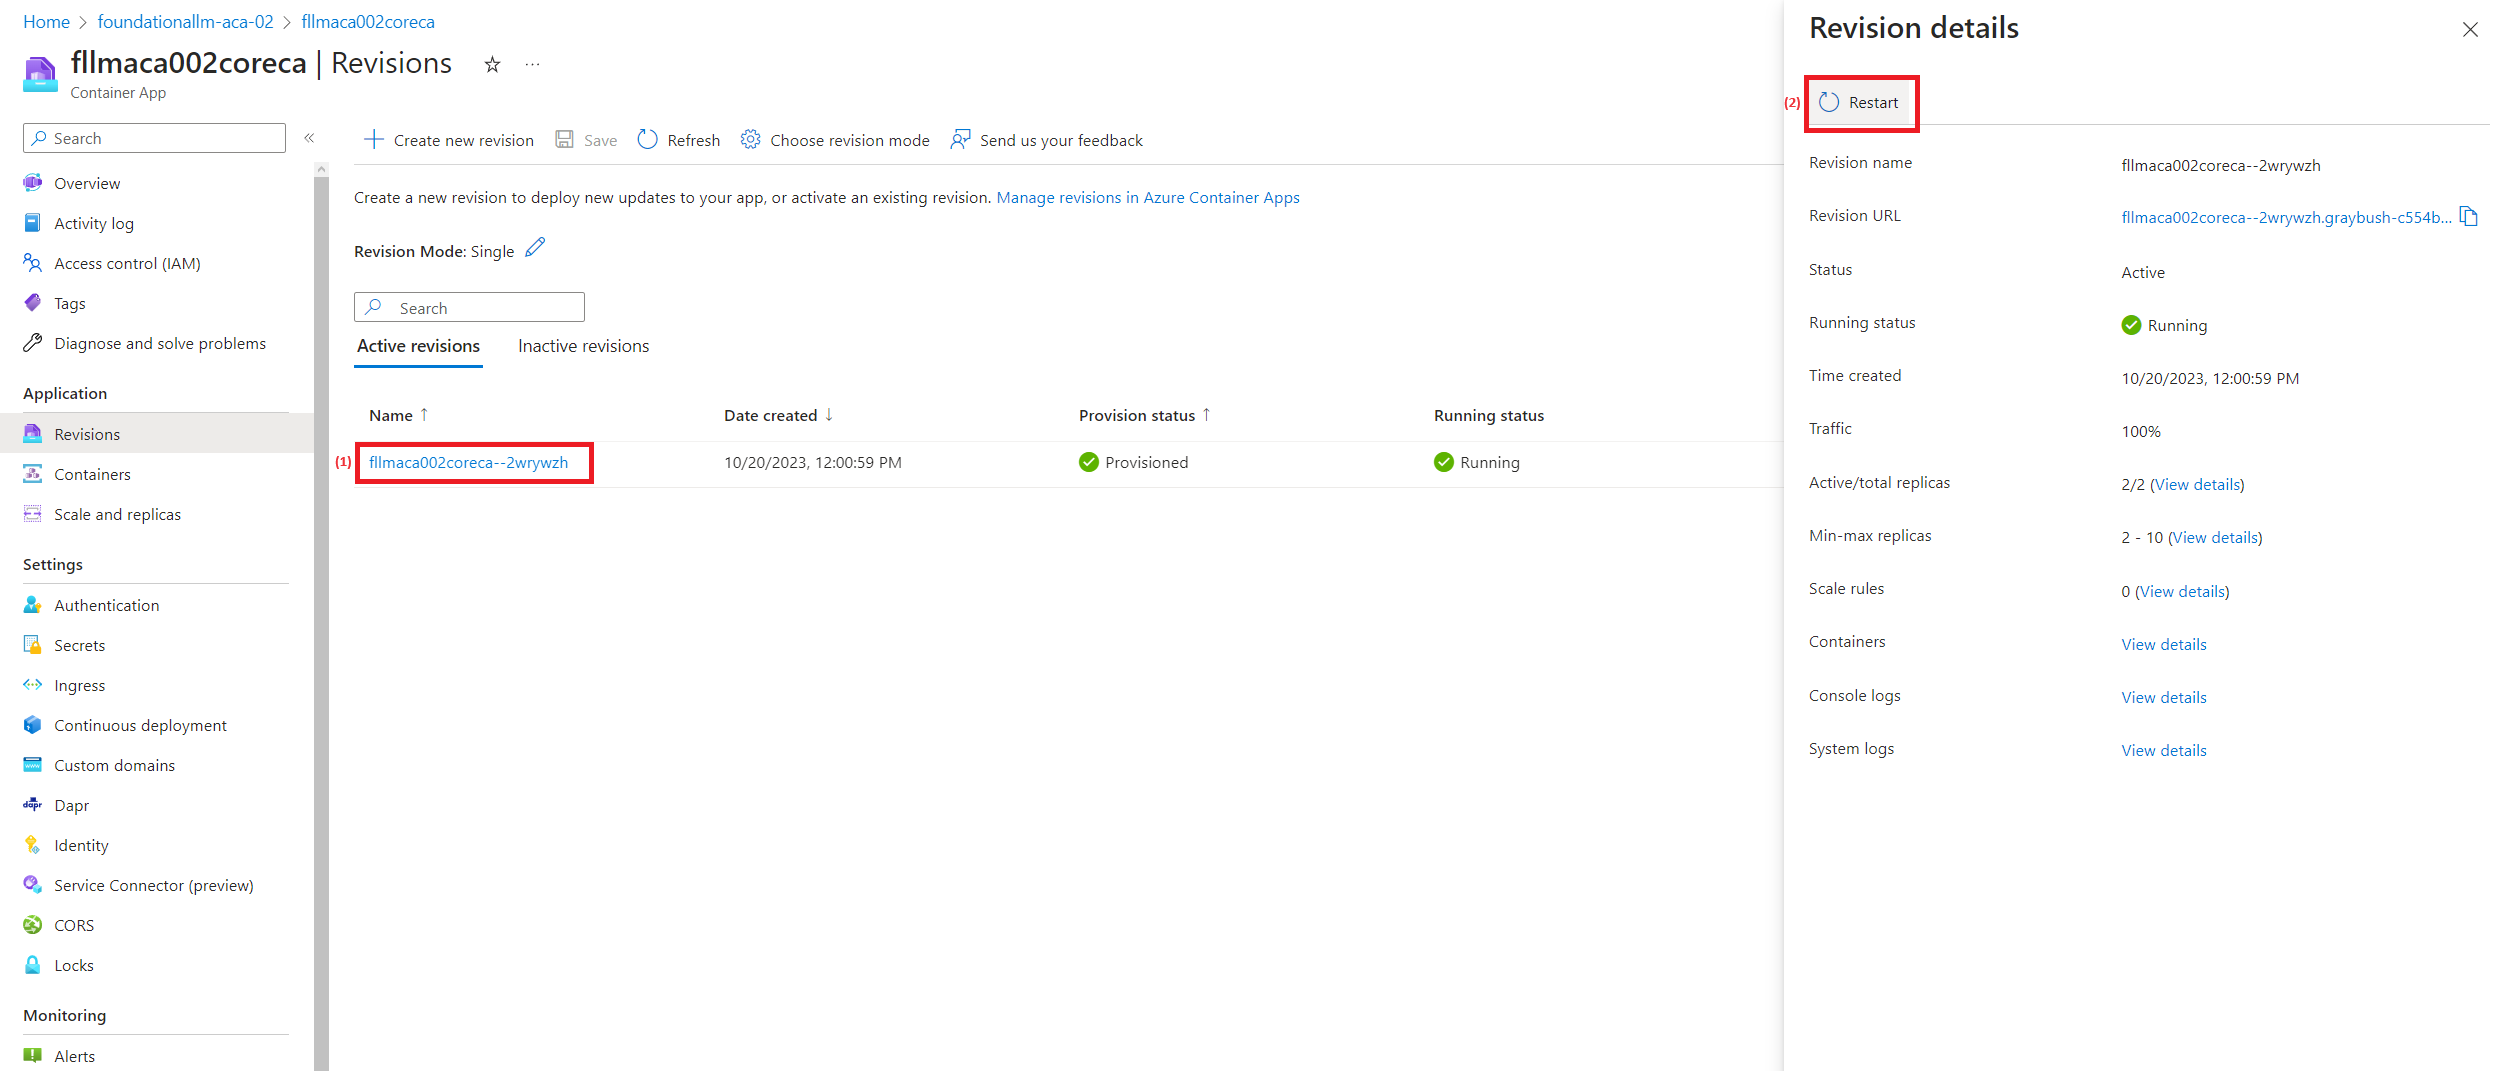
To restart the Core API and Chat applications in an Azure Container Apps (ACA) deployment, you will need to navigate to the Core API and Chat applications and restart their container revisions, as indicated in the following Azure Portal screenshot:

- From the
Revisionsblade in the left navigation panel of the Core API or Chat UI container app detail page in Azure Portal, select the name of the running revision. - A dialog panel titled
Revision detailsshould appear on the right side of the browser with aRestartbutton at the top. Select theRestartbutton to restart the running container.
Restarting in this manner will need to be performed for both the Core API container app and the Chat UI container app.
Restart Core API and Chat UI applications in an AKS Deployment
To restart the Core API and Chat applications in an Azure Kubernetes Service (AKS) deployment, you will need to navigate to the AKS detail page in Azure Portal and perform the following:
- Select the
Workloadsblade from the left navigation panel. - Select the
Podstab from theWorkloadsdetail page. - Select the Core API and Chat UI pods from the list (it helps if you select
defaultin theFilter by namespacedropdown first). - Select the
Deletebutton to terminate the currently running pods. New pods will be instantiated to take their place.
