Management API and portal authentication setup: Microsoft Entra ID
FoundationaLLM comes with out-of-the-box support for Microsoft Entra ID authentication. This means that you can use your Microsoft Entra ID account to log in to the management portal.
Create the Microsoft Entra ID applications
To enable Microsoft Entra ID authentication for the Management API and portal, you need to create two applications in the Microsoft Azure portal:
- A client application that will be used by the management portal to authenticate users.
- An API application that will be used by the Management API to authenticate users.
Create the client application
Register the client application in the Microsoft Entra ID admin center
Sign in to the Microsoft Entra ID admin center as at least a Cloud Application Administrator.
Browse to Identity > Applications > App registrations.
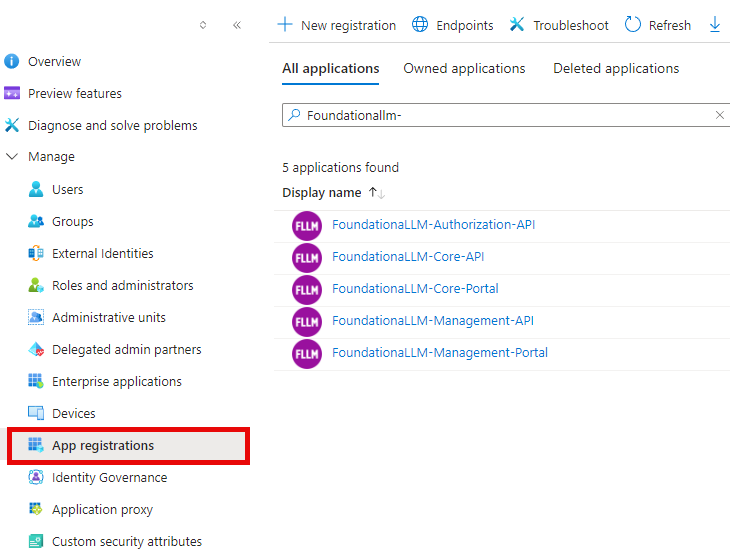
On the page that appears, select + New registration.
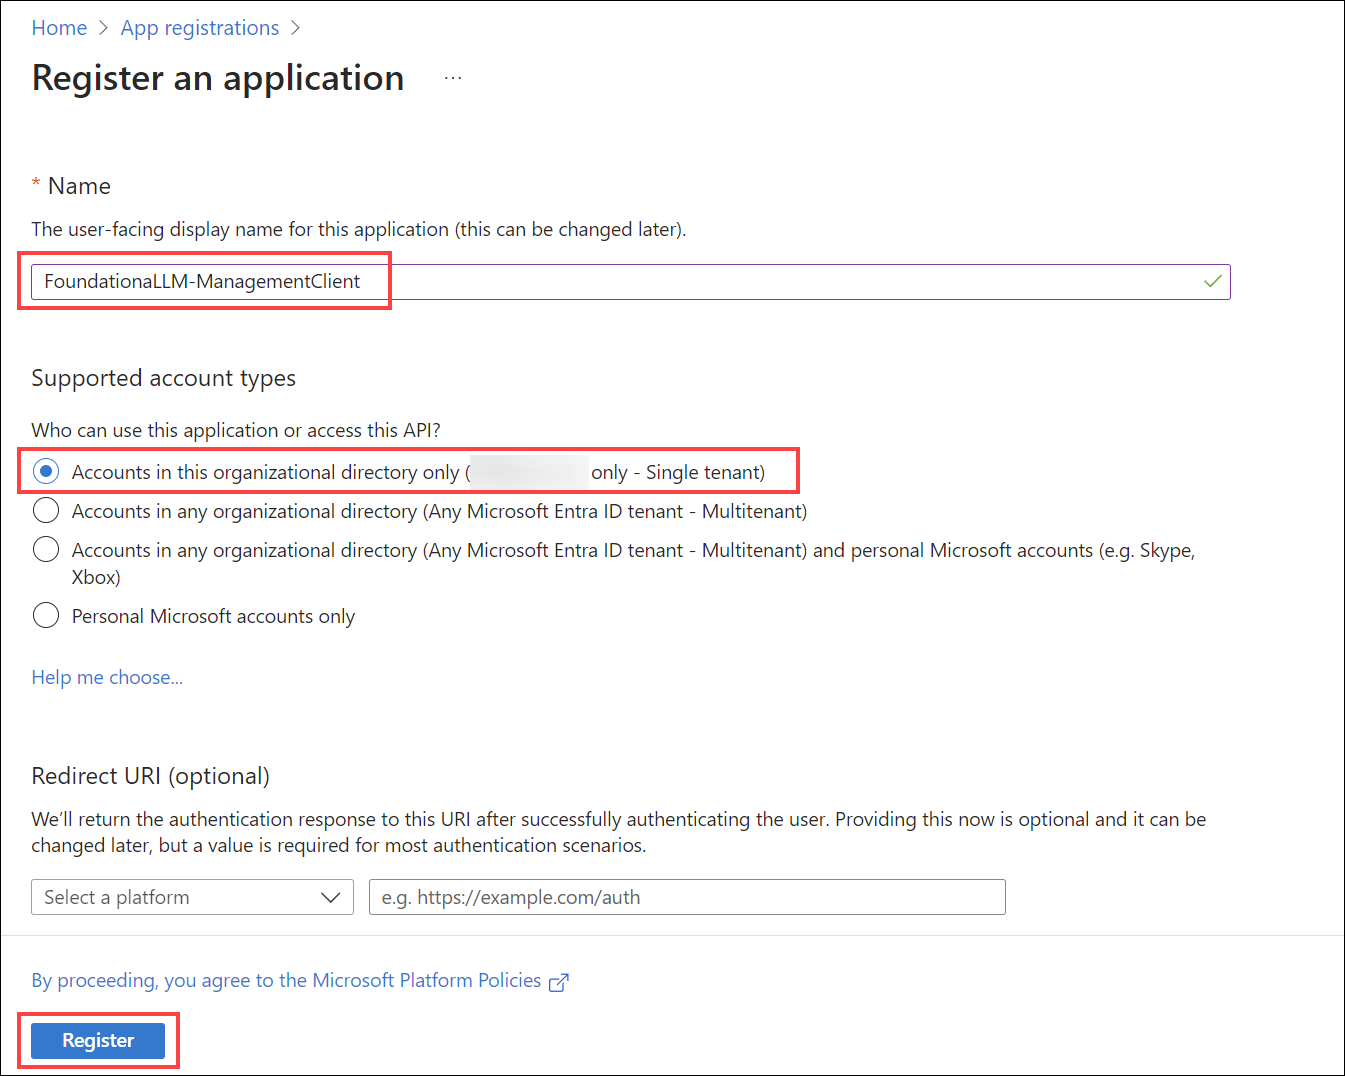
When the Register an application page appears, enter the name FoundationaLLM-Management-Portal for your application.
Under Supported account types, select Accounts in this organizational directory only.
Select Register.
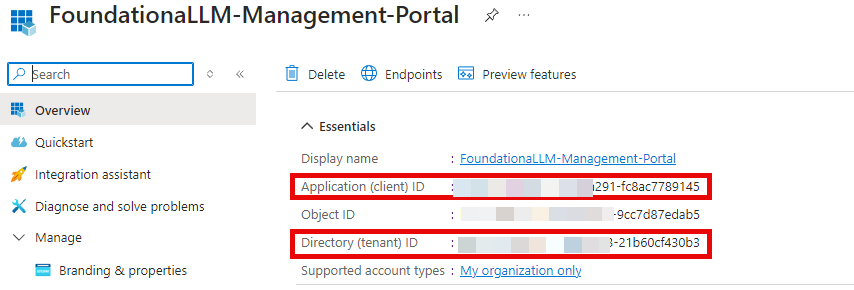
The application's Overview pane displays upon successful registration. Record the Application (client) ID and Directory (tenant) ID to add to your App Configuration settings later.
Add a redirect URI to the client application
Under Manage, select Authentication.
Under Platform configurations, select Add a platform. In the pane that opens, select Single-page application. This is for the Vue.js management application.
Add a Redirect URI under Single-page application for your deployed Vue.js management application. Enter
<YOUR_MANAGEMENT_APP_URL>/signin-oidc, replacing<YOUR_MANAGEMENT_APP_URL>with the management UI application URL. For example, it should look something likehttps://d85a09ce067141d5807a.eastus.aksapp.io/signin-oidcfor an AKS deployment, orhttps://fllmaca002managementuica.graybush-c554b849.eastus.azurecontainerapps.io/signin-oidcfor an ACA deployment.Add a Redirect URI under Single-page application for local development of the management portal Vue.js application:
http://localhost:3001/signin-oidc.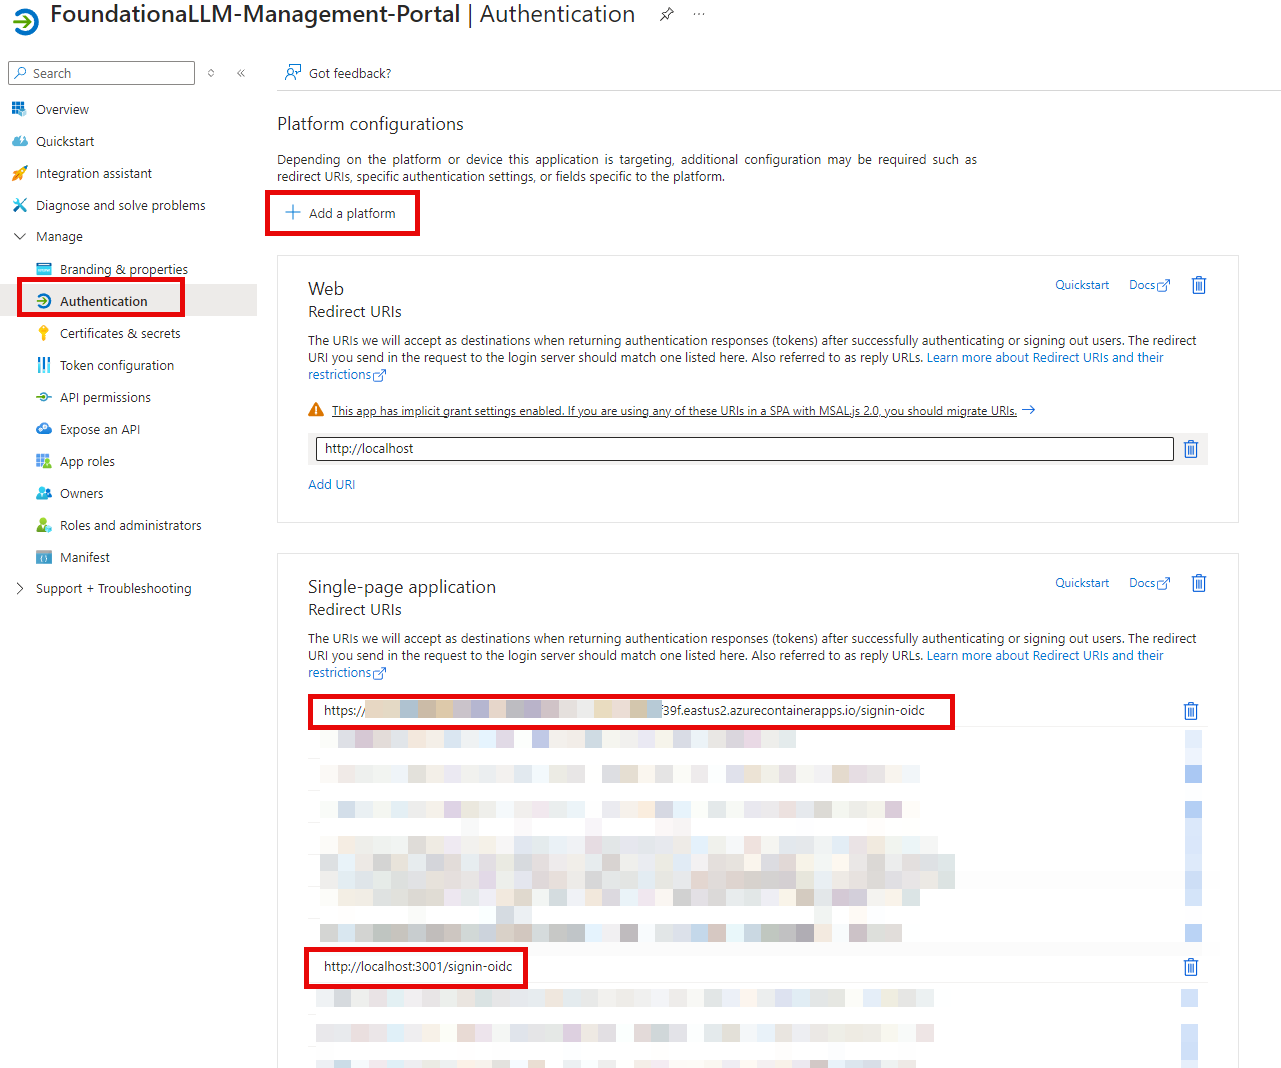
If you wish to configure authentication in Postman for executing calls against the Core API, you will need to add a Redirect URI under Mobile and desktop applications for Postman. Enter https://oauth.pstmn.io/v1/callback for the URI. To do this, complete the following steps:
Under Platform configurations, select Add a platform. In the pane that opens, select Mobile and desktop applications.
Enter
https://oauth.pstmn.io/v1/callbackfor the Custom redirect URIs value.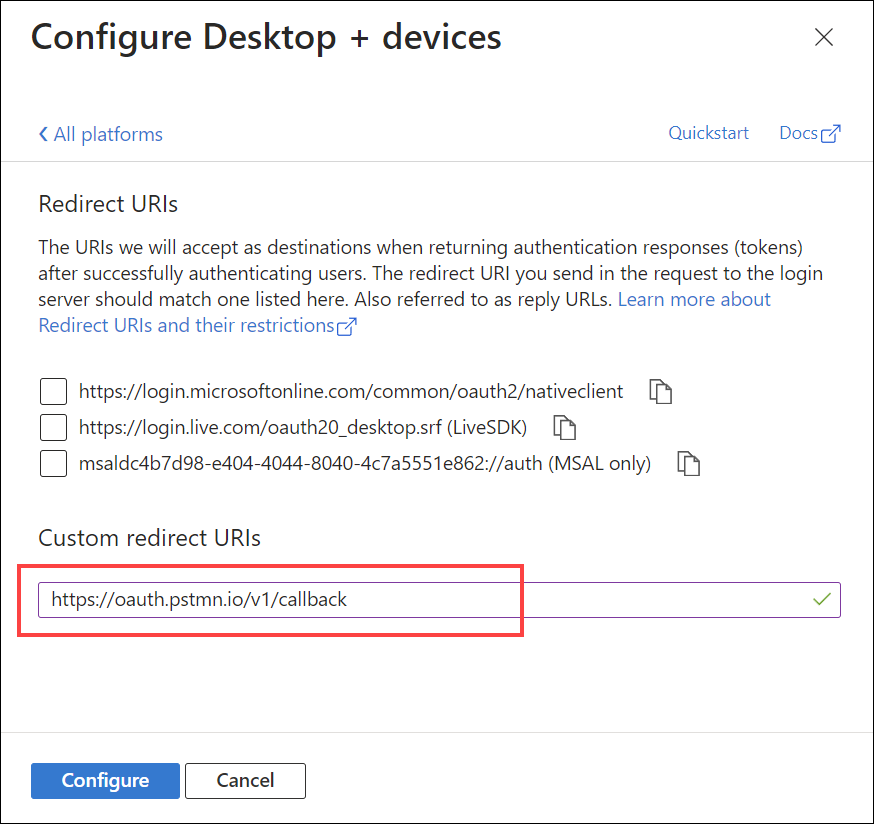
Select Configure to apply the changes.
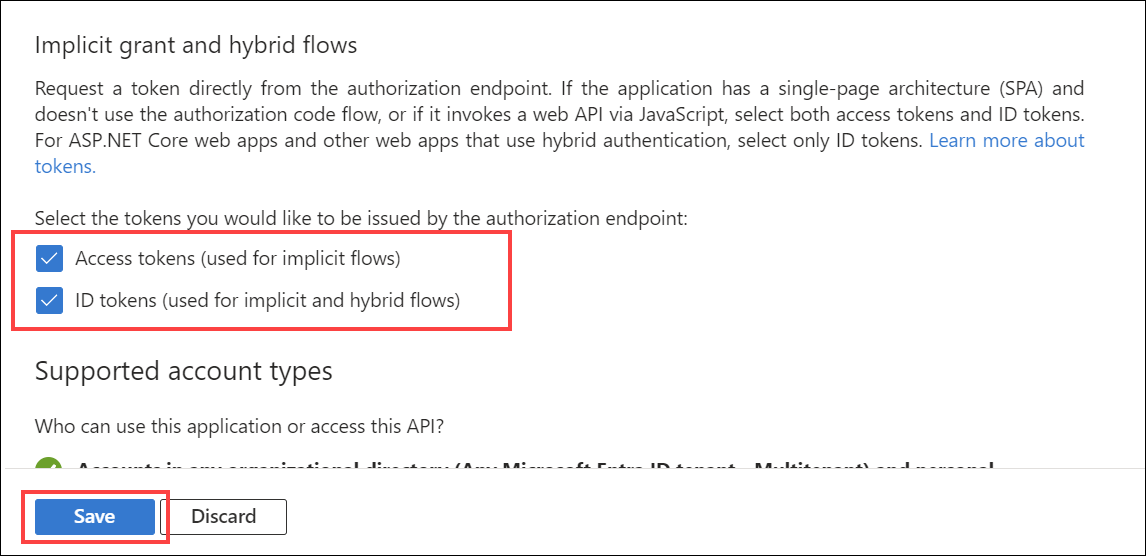
Implicit grant and hybrid flows for the client application
Check Access tokens and ID tokens under Implicit grant.
Select Configure to apply the changes (if the button is present).
Select Save at the bottom of the page to save the changes.
Update the client application manifest
Under Manage, select Manifest.
Locate the
accessTokenAcceptedVersionproperty and set its value to2.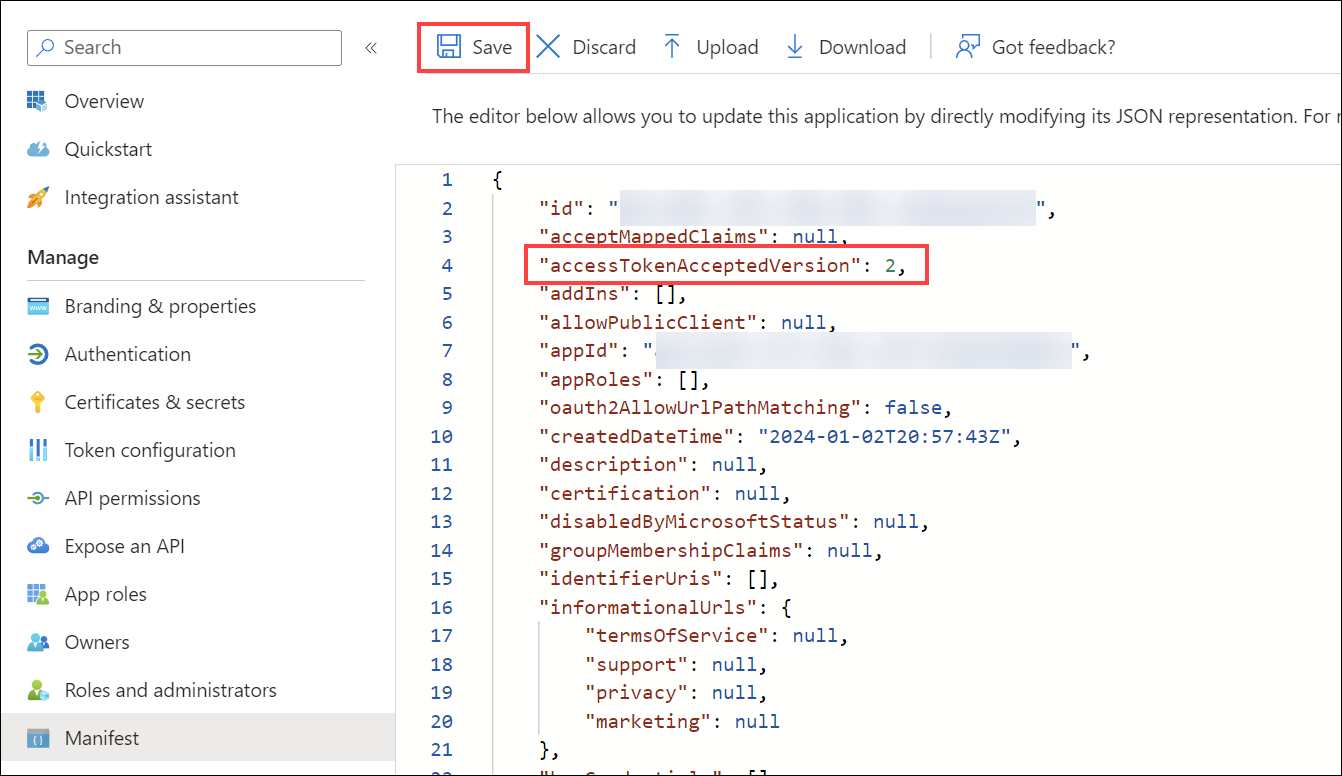
Select Save at the top of the page to save the changes.
Create the API application
Register the API application in the Microsoft Entra ID admin center
Return to the Microsoft Entra ID admin center.
Browse to Identity > Applications > App registrations and select + New registration.
For Name, enter a name for the application. For example, enter FoundationaLLM-Management. Users of the app will see this name, and can be changed later.
Under Supported account types, select Accounts in this organizational directory only.
Select Register.

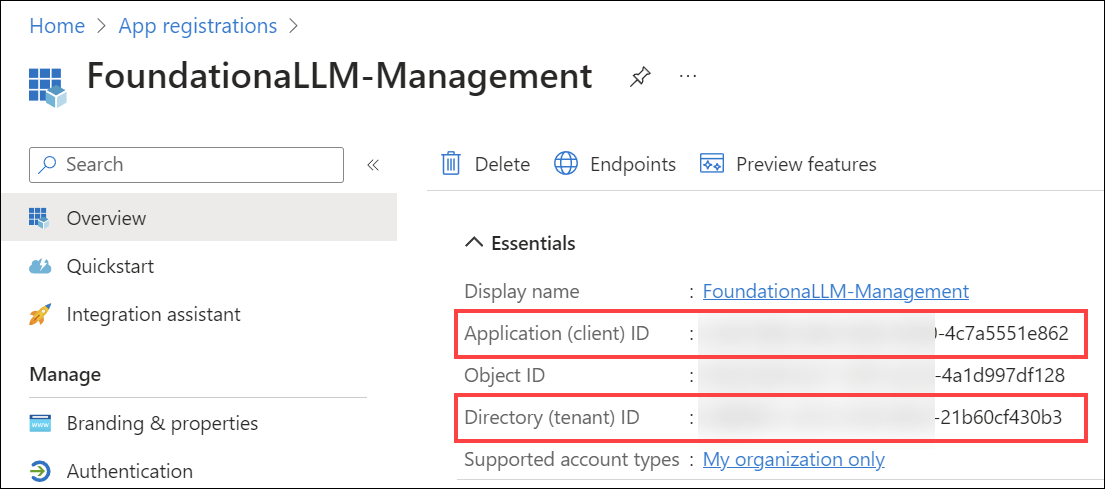
The application's Overview pane displays upon successful registration. Record the Application (client) ID and Directory (tenant) ID to add to your App Configuration settings later.
Implicit grant and hybrid flows for the API application
Select Authentication under Manage in the left-hand menu.
Select + Add a platform under Platform configurations. In the pane that opens, select Web.
Under "Redirect URIs", enter
http://localhostand select Configure. Please note that this value is not used in the FoundationaLLM solution, but is required in order to be able to select the access and ID tokens in the next step.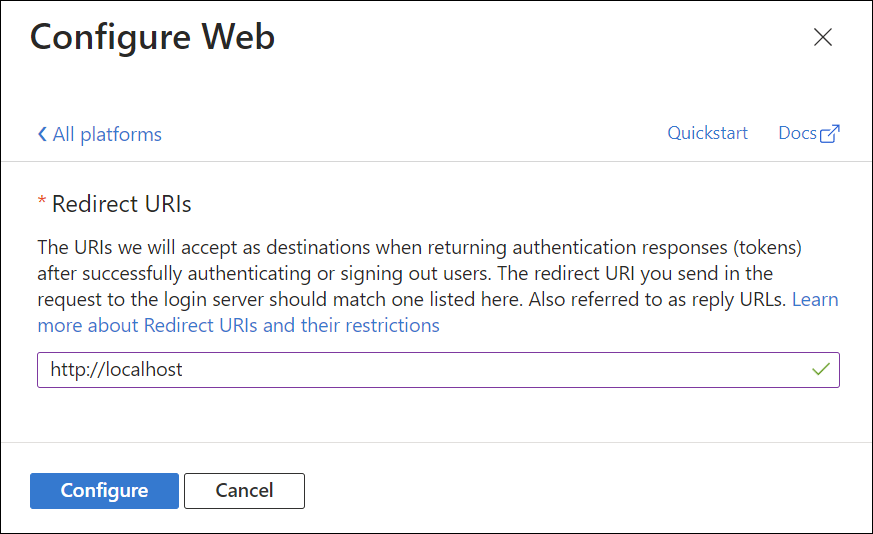
Check Access tokens and ID tokens under Implicit grant.
Select Configure to apply the changes.
Select Save at the bottom of the page to save the changes.
Expose an API for the API application
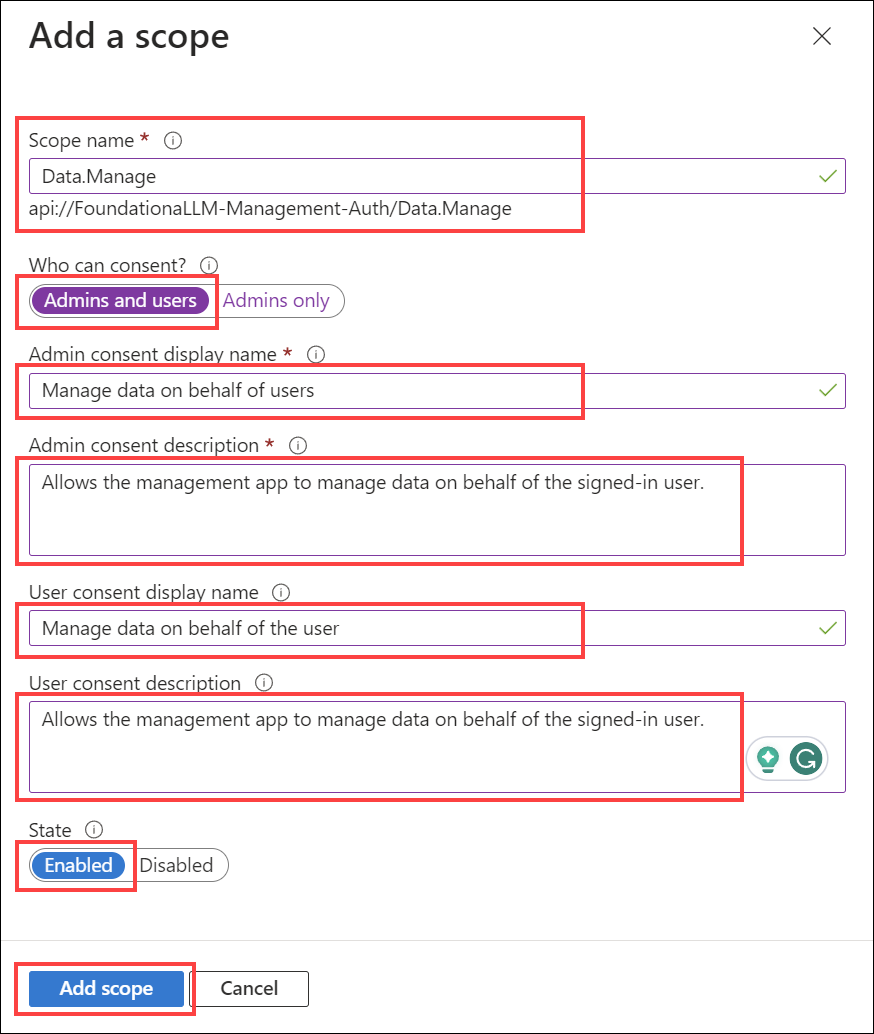
Under Manage, select Expose an API > Add a scope. For Application ID URI, accept the default or specify a custom one, then select Save and continue, and then enter the following details:
- Scope name:
Data.Manage - Who can consent?: Admins and users
- Admin consent display name:
Manage data on behalf of users - Admin consent description:
Allows the app to manage data on behalf of the signed-in user. - User consent display name:
Manage data on behalf of the user - User consent description:
Allows the app to manage data on behalf of the signed-in user. - State: Enabled
- Scope name:
Select Add scope to complete the scope addition.
Copy the Scope name value to add to your App Configuration settings later. It should look like
api://FoundationaLLM-Management/Data.Manage.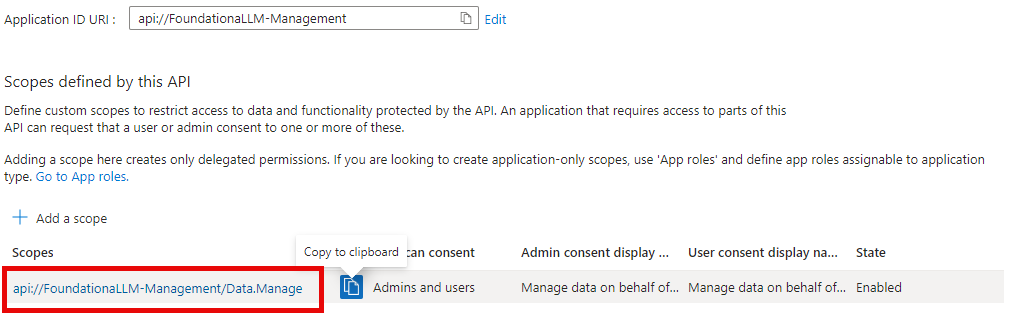
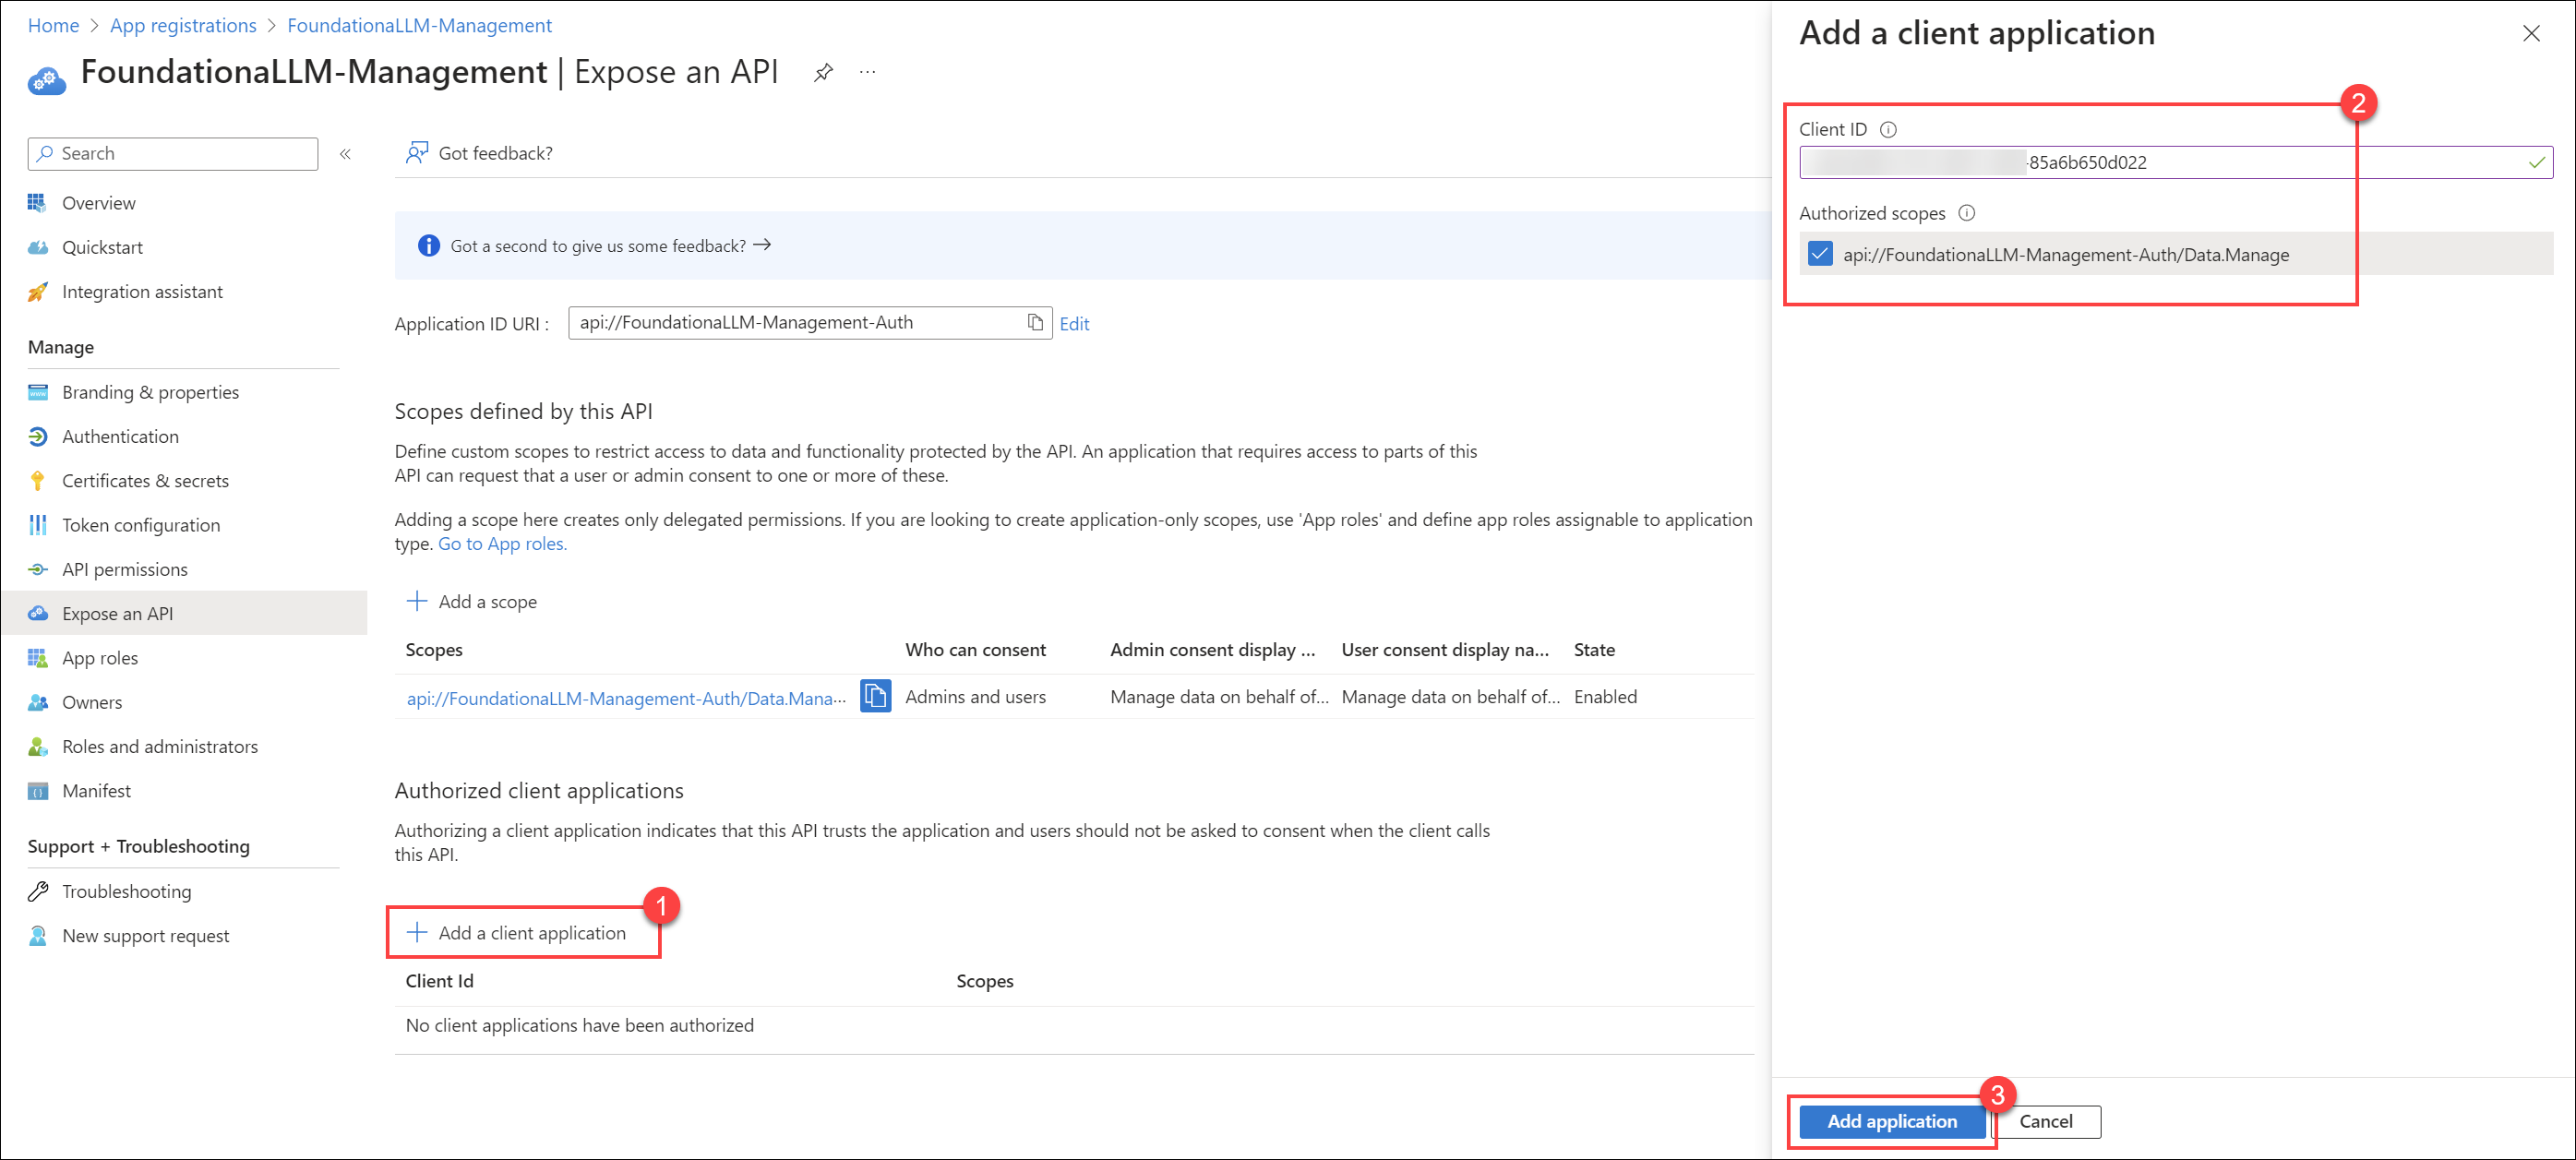
Add authorized client application
While still in the Expose an API section, select + Add a client application.
Paste the Application (client) ID of the client application that you created earlier.
Check the
Data.Manageauthorized scope that you created.Select Add application to complete the client application addition.
Update the API application manifest
Under Manage, select Manifest.
Locate the
accessTokenAcceptedVersionproperty and set its value to2.Select Save at the top of the page to save the changes.
Add API permissions for the client application
Browse to Identity > Applications > App registrations.
Select the
FoundationaLLM-Management-Portalapplication that you created earlier.Select API permissions.
Select + Add a permission under the "Configured permissions" section.
In the "Request API permissions" pan, select the My APIs tab, then select the
FoundationaLLM-Management-APIapplication.
Select the
Data.Managescope that you created earlier, then select Add permissions.
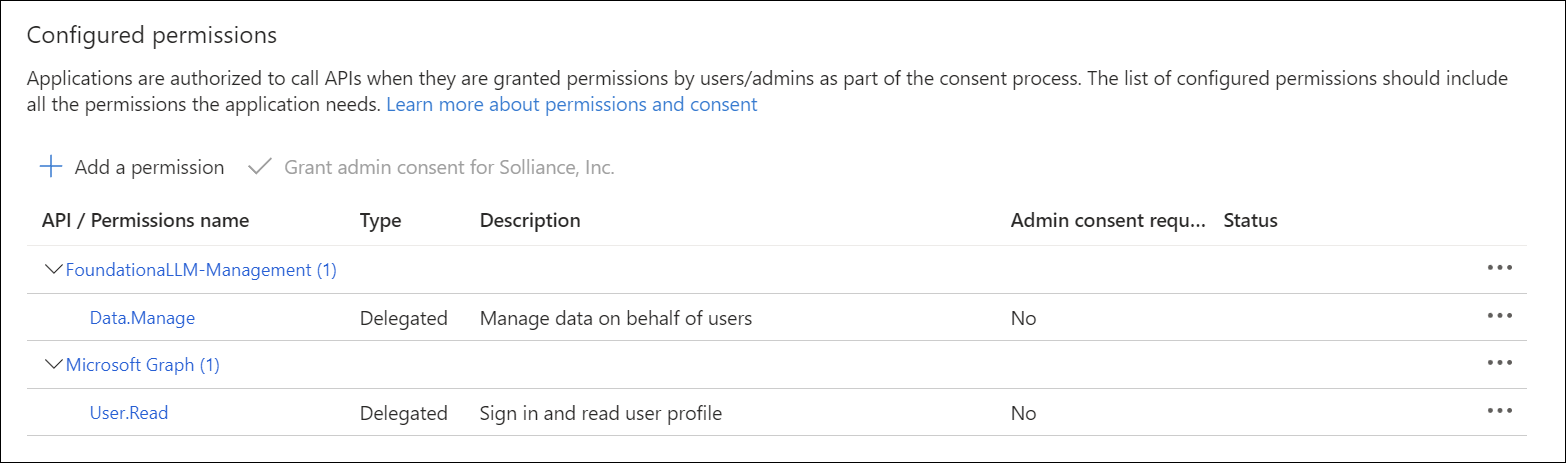
The client application's configured permissions should now look like the following: