Authorization setup: Microsoft Entra ID

FoundationaLLM comes with out-of-the-box support for Microsoft Entra ID authorization. This means that you can use your Microsoft Entra ID to setup authorization access to FoundationaLLM's platform.

Create the Microsoft Entra ID applications

To enable Microsoft Entra ID authorization to the FoundationaLLM platform, you need to register an application in the Microsoft Azure portal Entra ID:

Pre-requisites

Note

Make sure you create this App Registration before you run the deployment scripts using azd up as you will need some of the generated information during your azd env set calls

Setup App Configuration access

  1. Sign in to the Azure portal as at least a Contributor.
  2. Navigate to the Resource Group that was created as part of the deployment.
Note

If you performed an Azure Container Apps (ACA) or Azure Kubernetes Service (AKS) deployment, you will see an extra Resource Group that starts with ME_ or MC_ in addition to the Resource Group defined during the deployment. You will need to navigate to the Resource Group that does not start with ME_ or MC_ to access the App Configuration resource. 3. Select the App Configuration resource and select Configuration explorer to view the values. If you cannot access the configurations, add your user account as an App Configuration Data Owner through Access Control (IAM). You need this role in order to update the configurations as a required part of the authorization setup. To add your user account to the appropriate role, follow the instructions in the Configure access control for services document.

Create the client application

Register the client application in the Microsoft Entra ID admin center

  1. Sign in to the Microsoft Entra ID admin center as at least a Cloud Application Administrator.

  2. Browse to Identity > Applications > App registrations.
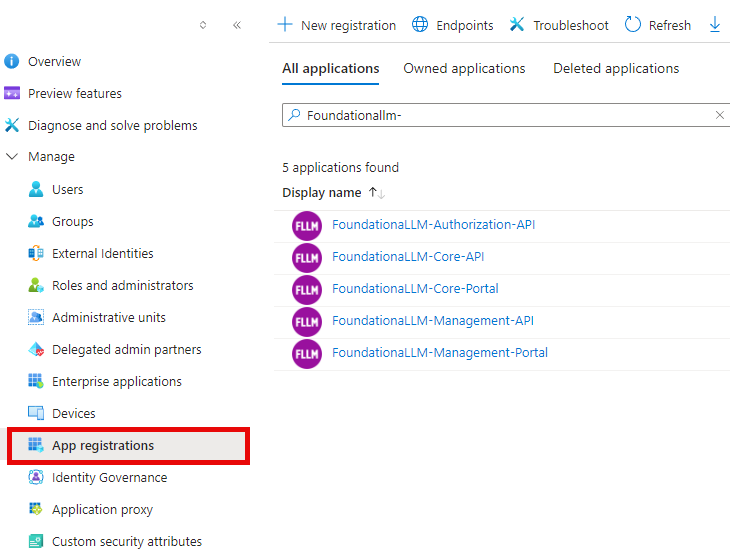
    The app registrations menu item in the left-hand menu is highlighted.

  3. On the page that appears, select + New registration.

  4. When the Register an application page appears, enter a name for your application, such as FoundationaLLM-Authorization.

  5. Under Supported account types, select Accounts in this organizational directory only.

  6. Select Register.

  7. The application's Overview pane displays upon successful registration. Record the Application (client) ID and Directory (tenant) ID to add to your App Configuration settings later.
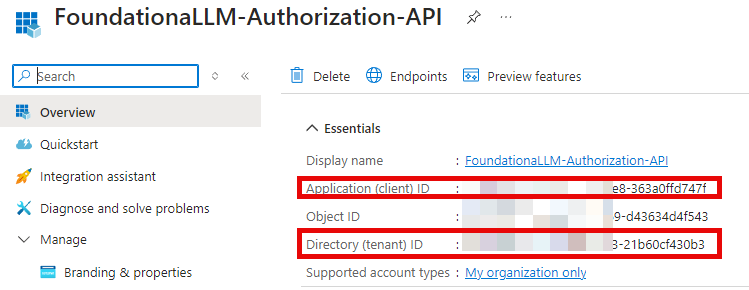
    The Entra app client ID and Directory ID values are highlighted in the Overview blade.

Expose an API for the API application

  1. Under Manage, select Expose an API > Add a scope. For Application ID URI, accept the default or specify a custom one like api://FoundationaLLM-Authorization-Auth, then select Save and continue, and then enter the following details:

    • Scope name: Authorization.Manage
    • Who can consent?: Admins and users
    • Admin consent display name: Manage Authorization
    • Admin consent description: Allows the app to manage data on behalf of the signed-in user.
    • User consent display name: Manage data on behalf of the user
    • User consent description: Allows the app to manage data on behalf of the signed-in user.
    • State: Enabled
  2. Select Add scope to complete the scope addition.
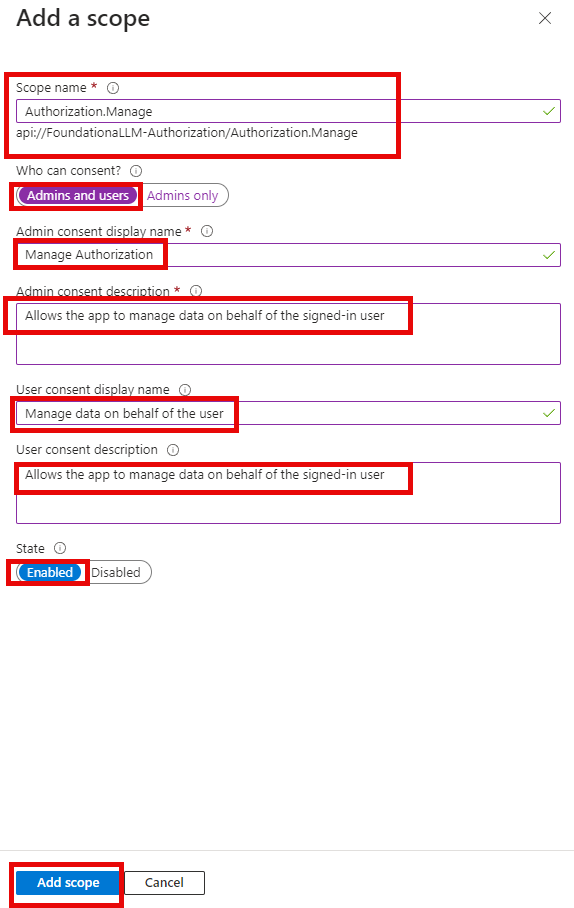
    The Add a scope form is displayed as described in the bulleted list above.

  3. Copy the Scope name value to add to your App Configuration settings later. For example, it should look something like api://c79a09ce067141d5832b/Data.Manage.

    The new scope name is displayed with the Copy button highlighted.

Update the client application manifest

  1. Under Manage, select Manifest.

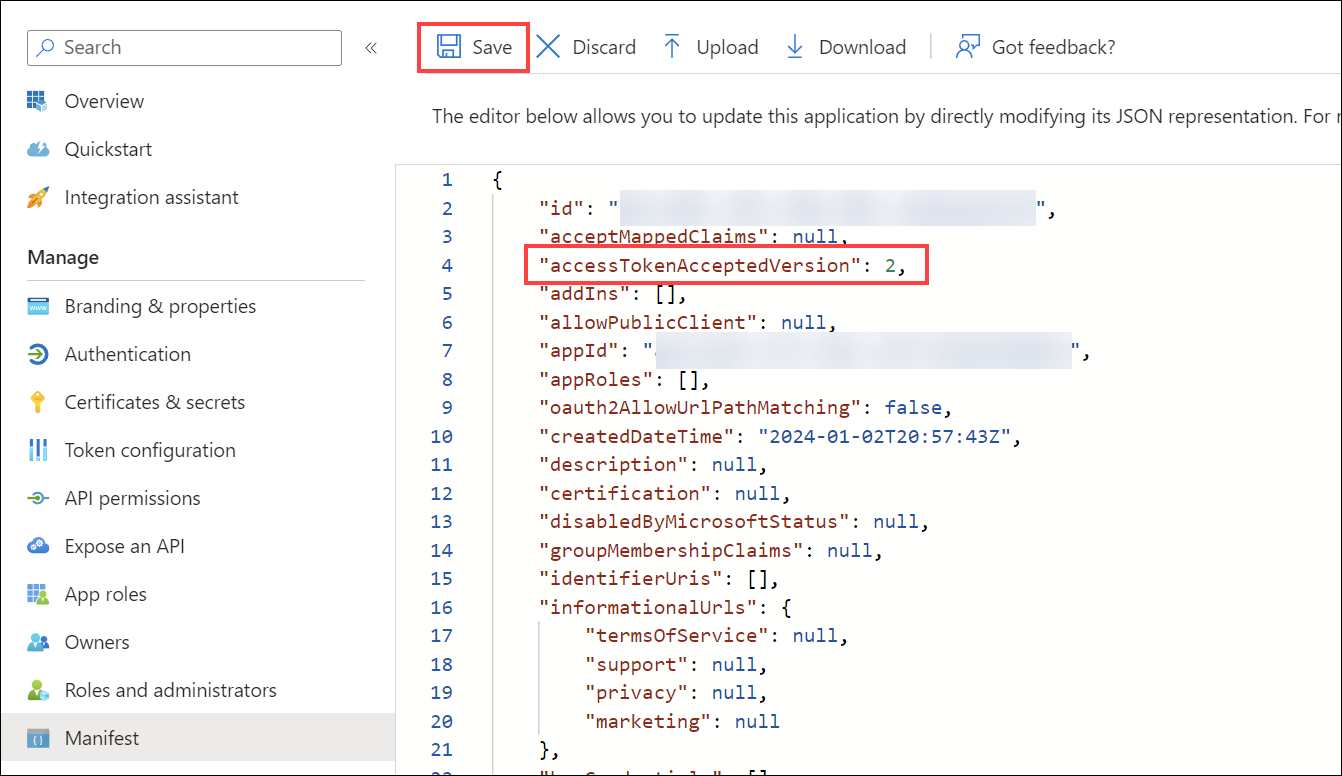
  2. Locate the accessTokenAcceptedVersion property and set its value to 2.

    The accessTokenAcceptedVersion property is highlighted.

  3. Select Save at the top of the page to save the changes.

Configure Authentication Flows

  1. Navigate to the Authentication tab. Select Add a platform. On the Configure platforms pane, select Web.
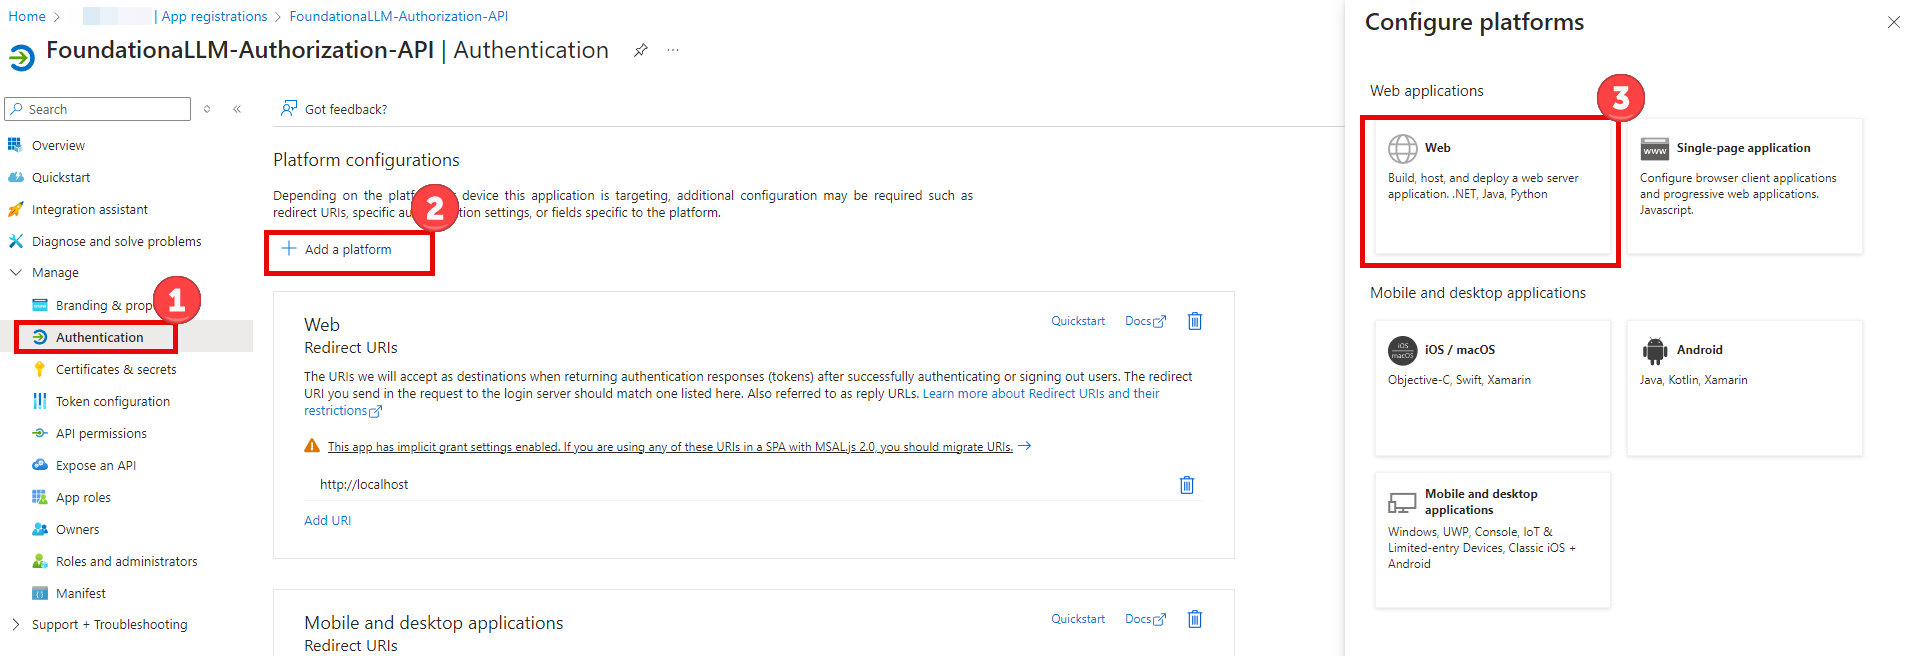
    Create a new Web application platform.

  2. Enter http://localhost under Redirect URIs. Then, below Implicit grant and hybrid flows, select both Access tokens and ID tokens. Finally, select Configure.
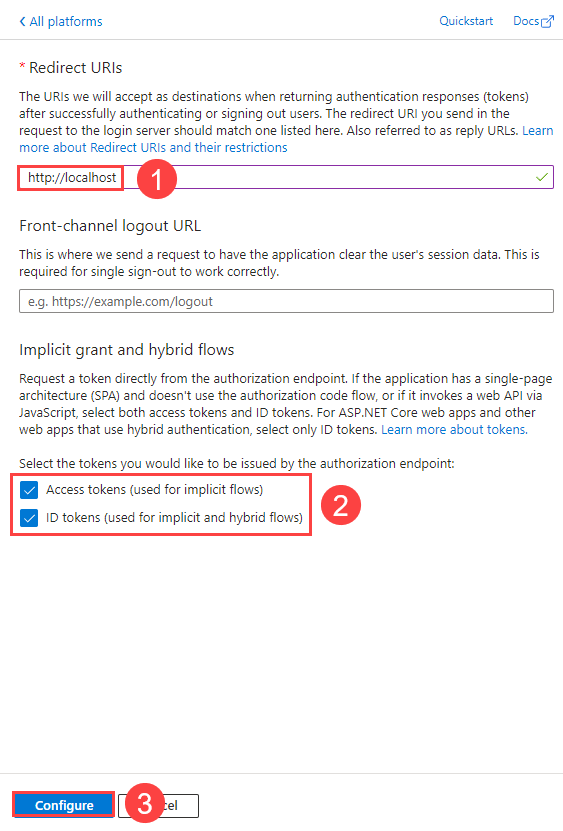
    Select "Access Tokens" and "ID Tokens".

Update App Configuration settings

  1. Sign in to the Azure portal as at least a Contributor.
  2. Navigate to the resource group that was created as part of the deployment.
  3. Select the App Configuration resource and select Configuration explorer to view the values.
  4. Enter authorization in the search box to filter the results.
  5. Check the box next to Key in the header to select all items.
  6. Find the key for FoundationaLLM:APIs:AuthorizationAPI:APIScope and click on edit.
  7. Replace the value with the value from the scope we created earlier, like api://FoundationaLLM-Authorization-Auth
  8. Select Apply to save the changes.

Next steps

Now that Entra authorization is fully configured, navigate to your Entra ID management console and make sure you completed all app registrations for all the other apps mentioned in the deployment documentation.